Показать
3084
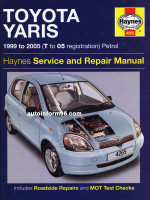
Toyota Yaris (Тойота Ярис). Руководство по ремонту, инструкция по эксплуатации. Модели с 1999 по 2005 год выпуска, оборудованные бензиновыми двигателями
Код товара:
5782
ISBN:
1-84425-265-5
Издательство:
Haynes Тип бумаги:
газетная
Язык:
английский
Переплет:
твердый
Цветность:
черно-белая
Нет в наличии!
Цена:
420 грн.
19 usd.
17 eur.
Быстрая покупка
Данное руководство может стать замечательным подарком автомобилисту . Ведь недаром говорят, что книга это лучший подарок, а если она еще и поможет автомобилисту в ремонте, обслуживании и эксплуатации своего автомобиля, Вы можете быть безусловно уверены в полезности и актуальности своего подарка.
Обзор книги по ремонту Toyota Yaris
VIDEO
Содержание
Living with your Toyota Yaris
Roadside repairs
Wheel changing
Preparation
When a puncture occurs, stop as soon as it is safe to do so.
Park on firm level ground, if possible, and well out of the way of other traffic.
Use hazard warning lights if necessary. If you have one, use a warning triangle to alert other drivers of your presence.
Apply the handbrake, and engage first or reverse gear (or P on automatic transmission).
Chock the wheel diagonally opposite the one being removed - a couple of large stones will do for this.
If the ground is soft, use a flat piece of wood to spread the load under the jack.
Changing the wheel
The spare wheel and tools are located in the luggage compartment, under the boot carpet. Fold back the carpet, then lift out the tool tray, which contains the jack handle, wheelbrace (and towing eye).
Unscrew the spare wheel retainer anticlockwise, then lift out the spare wheel. The vehicle jack is stored next to the spare wheel, at the rear of the wheel recess.
Prise off the wheel trim (where applicable) from the punctured wheel, using the end of the wheelbrace. Use the wheelbrace to loosen each wheel nut by half a turn. On models with alloy wheels, one of the wheel nuts may be of the locking type - use the ‘key’ tool (a special socket usually provided in the glovebox) with the wheelbrace to undo this.
Locate the jack head below the jacking point nearest the wheel to be changed. The jacking points are between two small indentations in the sill lower edge. Only use the jack on firm, level ground. Ensure that the slot in the jack head engages with the sill flange at the jacking point.
Turn the jack handle clockwise until the wheel is raised clear of the ground. Remove the nuts and lift the punctured wheel clear.
Fit the spare wheel. Refit the wheel nuts, tapered end inwards, and tighten moderately with the wheelbrace. Lower the car to the ground, then finally tighten the wheel nuts in a diagonal sequence. Refit the wheel trim (where applicable). Ideally, the wheel nuts should be slackened and retightened to the specified torque at the earliest opportunity.
Другие книги по ремонту и обслуживанию автомобилей Toyota:
Компания Автоинформ


 В корзине!


